Creating custom textures for Plutonium#
Requirements#
Photoshop can be used as an alternative to Paint.NET but since it's not free we're not going to provide a download link here. When using Photoshop you need the Intel Texture Works Plugin installed to be able to load and save .dds textures.
Getting Started#
1. Create a new folder anywhere on your pc, this is going to be used to store files while creating your custom texture.
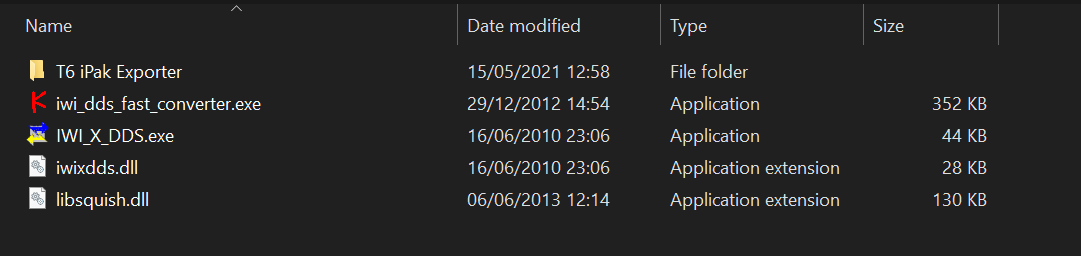
2. Download and extract the Texture Toolkit into the folder you created, your folder should now look like this:
3. Install Paint.NET or install Photoshop and the Intel Texture Works Plugin.
4. Locate the folder of the game you want to create a custom texture/camo for.
Exporting the Texture you want to modify#
To modify a texture we first have to export it from the corresponding game files. This works pretty much the same for T4 and IW5 but works differently for T6.
T4, T5, and IW5#
1. Navigate to the main folder in your game folder.
2. Open one or more of the .iwd files (iw_xx.iwd) with 7Zip or WinRAR (right click the file -> open with... -> select 7Zip or WinRAR).
3. Locate the texture you want to modify inside the .iwd file and extract it to the folder you created earlier (simply drag and drop it out of the 7Zip/WinRAR window).
4. Open the folder that contains the files from the Texture Toolkit in a new explorer window.
5. Open IWI_X_DDS.exe and Drag and drop the previously extracted .iwi file onto the IWI_X_DDS window, this will convert the .iwi file to .dds
If the filename of the .iwi file contains ~ or similar symbols the converter will replace those with _, this means you need to change the name of the .dds so the filename is exactly the same as the one of the original .iwi file.
T6#
1. Navigate to the all folder located inside the zone folder in your T6 game folder.
2. Open the T6 iPak Exporter folder included in the Texture Toolkit in a new explorer window.
3. Drag and drop an .ipak file from the all folder onto Tom_BO2_iPak.exe, this will export all textures from the .ipak directly to .dds.
Most game textures are located in base.ipak, the dlc-specific ones are located in dlc0/1/2/3/4.ipak.
Finding the correct texture can be tedious, you may have to convert and look at multiple textures before you find the one you're looking for. The best way is to simply look at the filenames and filesizes of the .iwi's, weapon camos usually start with weapon_ or wpn_ and are >1MB in size.
Modifying your Texture#
1. Open the .dds file with Paint.NET or Photoshop and edit it to your liking
2. As soon as you're done editing it save the file:
Exporting/Saving the file in Paint.NET#
In Paint.NET simply click File -> save as and save the file in the folder you created earlier, you can overwrite the original .dds file.
Exporting/Saving the file in Photoshop#
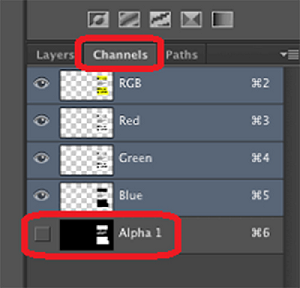
1. In Photoshop check if the texture contains an alpha channel, you can check in the menu on the right, switch to the Channels tab.
2. Go to file -> save as and select Intel Texture Works (*.DDS, *,DDS)" Format (below File Name), select the previously created folder as your destination and hit save (you can overwrite the original .dds file).
3. A dialogue should pop up that lets you define different compression settings, depending on if your texture contains an alpha channel, no alpha channel or is a normal map select the texture type and compression like so:

4. Hit Ok to save the file.
Converting the Texture back to iwi and loading it in-game#
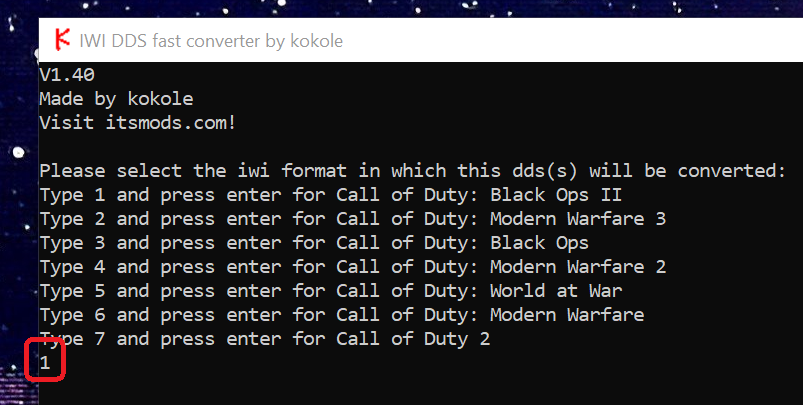
1. Drag and drop your modified .dds file onto iwi_dds_fast_converter.exe which also comes with the Texture Toolkit.
2. Type in the number that corresponds to the game you're creating a texture for and hit enter.
3. The converter will create an .iwi file next to your .dds file, now you can learn how load your modified texture in-game.
Do not attempt to load your modified textures by putting them back into the original .iwd file, use our designated folders which is explained in the link above.